Monday, April 04, 2011

How to us the shared library technique to embed fonts in your project?

In my last post I did explain how to use the EMBED method to use multiple fonts in just one text field. This method works a bit different, it uses a combination of embedded fonts and style sheets.

This is a quit simple technique to apply to any project. When you're creating new fonts in the library you need to give them there original name instead of using  Font1, Font2 etc. It's really annoying for other developers when the fonts aren't named properly in the library. So give the fonts a proper name, it saves you and your colleagues a lot of time.

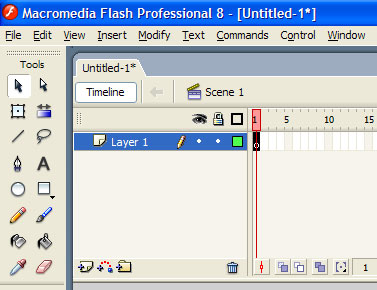
So first thing we are going tot do is create a font.fla. where we are going to put in all our font files.On the stage you are going to put text fields with all the fonts you want to use.

But before we're going to do that we are first going to put the fonts in to the library. See picture below.


You can add fonts to the library by clicking on the small triangle in the library panel. See picture on the right side. You now created a new font in your library.


Right click on the font in your library. You should see then the same panel as in the picture below. Select the font give it the same name as in the drop down and also include the style of the font. This is so you know witch font it is and witch style it has. After you did that, select all the characters you want to embed. You can include the characters you want by clicking on the check boxes under “Character ranges”.


In this properties panel go to the “actionscript” tab. Check “Export for runtime sharing” and give as URL the swf name of this asset. In my case that's fonts.swf. No compile this file if everything went ok you should have a swf file in the output folder of your fla.


The next step is very easy create a new fla file. I called my fla file fontTest.fla. So what you are going to do is copy the fonts from the font.fla library to this new fla file you just have created. Now create a text field as in the picture shown below.


In properties panel select the font from the library. A library font is always marked with a (*).  Select the library font you want to use for that particular text field. Do one final check to see if the fonts are ready to be imported.


Go to your library and right click one the font, go to properties, select the “actionscript” tab and check if the check box “import for runtime sharing” is checked.


In order to use a different font in the same text field we have to use a style sheet in flash and point to this particular font. To make this work you need to have the internal font name, you can retrieve this by adding a text field tot the stage and set library font you want. After you did that you click on the menu item in the flash IDE “commands” and select the option “Copy Font Name for Actioscript”. Now you have the internal font name on the clipboard.

What I didn't mention was that you have to give the just placed text field on the stage a  instance name. I named my text field “tf”.

So now create a new class named MainIDE.as place this class in the same folder as your fla file and add the following code:

MainIDE.as
package
{
    import flash.display.MovieClip;
    import flash.text.AntiAliasType;
    import flash.text.StyleSheet;
    import flash.text.TextField;
    import flash.text.TextFieldAutoSize;


    /**
     * @author iason.vandermeulen
     */
    public class MainIDE extends MovieClip
    {
        public var tf : TextField;
        private var _css : StyleSheet;


        public function MainIDE()
        {
            this._css = new StyleSheet();
            this._css.parseCSS("strong{color:#000000; font-family:Univers LT Std 57 Cn; fontSize:14; leading:0px; display:inline;}");
            this.tf.styleSheet = this._css;


            this.tf.embedFonts = true;
            this.tf.antiAliasType = AntiAliasType.ADVANCED;
            this.tf.autoSize = TextFieldAutoSize.LEFT;
            this.tf.htmlText = "<strong>Just a test</strong> for a test example.";
        }
    }
}

Now look at the line where the css style is defined and where the font name is bold. There where it is bold you will paste your just copied internal font name. Now it's going to use this particular font where ever it finds a <strong> html tag in the text. 

In order to compile this example you need to a sign the MainIDE.as file in the document root of your fla file.  If you don't know how to do that, search on google!

See the result in the image below after compiling

Thursday, March 31, 2011

Also having this problem with multiple fonts in flash?

I always had issue’s loading multiple fonts in to flash, so this time I toughed let’s take a bit more time to understand the problem.

The problem I encounter most is: When you have to embed multiple fonts into one text field. For example you have one font that’s called “Universal LT Std Bold Cn” and “Universal LT Std Cn”. Both don’t have font styles except the regular font style. So no bold or anything else is available to you. That’s why there’re different fonts for different styles in the first place.

There are two ways to deal with this problem. One of them is using the shared runtime technique the other technique is done with the EMBED code in actionscript. Depending on how your project is setup, one off the two probably suites you best.

I prefer the EMBED method. First of all, most of the time I don’t work in the Flash IDE but in a actionscript editor like FDT. The EMBED method is easier to use in combination with other classes I think and probably takes less time to implement.
However there is one disadvantage to this technique. You can’t us it in combination with the IDE (compiling with the IDE) unless you add the complete Flex SDK to your IDE library path, by doing this file size will grow.

In this post I am going to explain the EMBED technique. In my next post I will explain the import shared library technique.

First of all you have to create a font folder where you will put your fonts, so the files can be embedded. We also do this because we use SVN and by adding this folder to SVN all other developers don’t have to search for the used fonts in this particular project.

Your project folder should look like this, I know it’s not well organized, swf and fla files should be separated. But sins this project is so small I think it isn’t necessary to put them all in their own folder.

project folder structure
So, next step is to write your own font class. To keep the fonts and the font classes organized we put them all in the font folder.

As you can see I have created this “UniversalLtStd.as” class. In this class you creat the following:
package fonts
{
      import flash.text.Font;
      /**
       * @author iason.vandermeulen
       */

      public class UniversalLtStd
      {
            public static const NAME : String = "UniversLTStd";

            /*    Flex SDK 3.* embed syntax
            [Embed(
             * source='UniversLTStd-Cn.otf',
             * fontName='UniversLTStd',
             * fontWeight='regular',
             * fontStyle='57 Condensed',
             * unicodeRange='U+0000-U+007F,U+0080-U+00FF'
             * )]
             */
         
            // Fleks SDK 4.* embed syntax
            [Embed(
                  source="UniversLTStd-Cn.otf",
                  embedAsCFF="false",
                  fontName="UniversLTStd",
                  fontWeight='regular',
                  mimeType="application/x-font",
                  unicodeRange='U+0000-U+007F,U+0080-U+00FF'
            )]
            public static const _regularClass : Class;

            [Embed(
                  source="UniversLTStd-BoldCn.otf",
                  embedAsCFF="false",
                  fontName="UniversLTStd",
                  fontWeight='bold',
                  mimeType="application/x-font",
                  unicodeRange='U+0000-U+007F,U+0080-U+00FF'
            )]
            public static const _boldClass : Class;

            public static function register() : void
            {
                  Font.registerFont(_regularClass);
                  Font.registerFont(_boldClass);
            }
      }
}

And this is how my main class looks like
package
{
      import fonts.UniversalLtStd;
      import flash.display.MovieClip;
      import flash.text.AntiAliasType;
      import flash.text.TextField;
      import flash.text.TextFieldAutoSize;
      import flash.text.TextFormat;
      /**
       * @author iason.vandermeulen
       */

      public class MainFDT extends MovieClip
      {
            private var _tf : TextField;
            private var _format : TextFormat;

            public function MainFDT()
            {
                  this._format = new TextFormat();
                  this._format.font = UniversalLtStd.NAME;
                  this._format.size = 12;
                  this._format.color = 0x0;          

                  this._tf = new TextField();
                  this._tf.defaultTextFormat = this._format;
                  this._tf.embedFonts = true;
                  this._tf.antiAliasType = AntiAliasType.ADVANCED;
                  this._tf.autoSize = TextFieldAutoSize.LEFT;
                  this._tf.x = 25;
                  this._tf.y = 25;
                  this._tf.height = 200;
                  this._tf.width = 400;
                  this._tf.border = true;
                  this._tf.htmlText = "<b>This is a test</b> and it seems to be working";
                  this.addChild(this._tf);
            }
      }
}

In order to compile this you have to create a launche file in FDT or FB and target the mainFDT class en set the output file to what ever you'd like to call it. My output file is main.swf, most logical.

Wednesday, March 23, 2011

So lets start with a project that just has bin finished

Recently I have worked on a Rexona campaign with my colleges, called Miss Rexona Beauty. It was a project that was going to run on Hyves (a social network website that's being used by a lot of people in the Netherlands, you could compare it with Facebook only smaller).

It was a cool project to do because I learned some new things for example how to make a fisheye effect and apply this to a image. This effect is also called in development terms a "Displacement Map Filter". I had never done this before so it was a challenge to see how it works and how to apply it.

If you are interested in how you can make a fisheye effect with the displacement map filter then visit the website of Emanuele Feronato it helped me a lot to understand how the filter works.

The complete project has bin created with the Temple library and Gaia. For more information about the Temple library visit this website you will find documentation and examples there. For the Gaia Framework visit this website.

Miss Rexona Beauty by MediaMonks

New Job new start

Sinds 1 december I am working for a company called MediaMonks it's stationed in Hilversum the Netherlands and in Londen. It's a company with many professionals and many disciplines.
For example the flash developers like my self, game developers, Ipad and Android developers, front-end people, 3d animators and modellers, back-end programmers, designers etc. etc. and many more.

The nice thing of this company is that it can do almost everything in house, so there is a lot of knowledge in this company to learn form. Besides that, it's a great company to work for they also organise awesome parties witch is nice to and is good for the spirit on the working flour.

I am proud to be Monk :)

Saturday, November 07, 2009

Lets start blogging again ...

As you can see I haven't bin very active in the past 3 years. However I would like to continue my blog with some new posts. At the moment I am really in to AS3 OOP (Object Oriented Programming).
It still is kinda new for me and still learning every day.
In my upcoming post I am going to start with some basic OOP and show you how it works. I'll show you how to use a XML file in your flash application with AS3.

Hope to see you people back soon...

Monday, February 13, 2006

PHP Class for MySQL queries

In this tutorial I am going to explain how a php class basically works. Some knowledge of PHP is required to really understand how a class works.

1. Creating a new PHP document
2. Writing the PHP code2.1 Creating the class
3. Communicate with the class

Creating a new document
First of all we have to create three new documents, open notepad or any text editor. This could also be dreamweaver or any other web page software.When you have opened notepad don't start typing, first save the file with the name queryClass.php, showQuery.php and connex.php. Don't forget the extension else you will get an txt file instead of an PHP file.

Writing the PHP code
Now the few things you must know are, that "$anyname" stands for a variable, we can store information init. We also can use variables inside of an class "$this->anyname", you could also send a variable back to the page the executed the function in the class. If you don't really understand what I mean check out the examples later.


creating a connection with the mysql server
//Save this in the file connex.php

<?php
$connection = mysql_connect('localhost',
'mysql_login_here',
'mysql_password_here')
or die ("Couldn't connect to mysql server");
$database = mysql_select_db('your datbase');
or die ("Couldn't connect to database");
?>


Creating the Class
//Save this in the file queryClass.php

<?php
Class querySelect {
include('connex.php');
var $id;
var $subject;
var $text;
var $table;

function queryOnId(){
$query = "SELECT * FROM $this->$table WHERE id=$this->id";
$result = mysql_query($query);
or die ("Query error");
if(empty($result)){
echo "Ther where no results";
}else{

$this->row_set = mysql_fetch_assoc($result);
$this->row_set['subject'];
$this->row_set['text'];


mysql_free_result($result);
mysql_close($connection);
$this->done = "true";
}
?>


Showing the query
//Save this in the file showQuery.php

<?php
include('queryClass.php');
$querySelect = new querySelect();
$querySelect->id = $_POST['id'];
$querySelect->queryOnId();
$done = $querySelect->done;
$row_set = $querySelect->row_set;
?>
<html>
<head>
<title>MyQuery</title>
</head>
<body>
<?php
if(isset($done)){
?>

<?php while($row_set){ ?>
<table width="600" border="1" cellpadding="0" cellspacing="0">
<tr>
<td><?php echo "$row_set['subject']";?></td>
</tr>
<tr>
<td><?php echo "$row_set['text']";?></td>
</tr>
</table>
<?php } ?>

</body>

Wednesday, February 08, 2006

Use XML content in Flash8


In this small tutorial I am going to show you how to use XML content in flash.

Step1: Creating your own XML file
Step2: Creating the action-script code in Flash
Step3: Place the content in a dynamic text box

Creating you own XML file
You can create an XML file in notepad or any other text editor, notepad for example.

In notepad place the following code.
<?xml version="1.0" encoding="utf-8" standalone="yes"?>
<mytext>
<message>
<subject>This is a tutorial about XML</subject>
<text>Here you can place you own text</text>
</message>
</mytext>
now save the file with the name mytext and don't forget the extension .xml else you will create a txt file instead of an XML file.

Creating the action script code in Flash
No we are going to create a new flash document. Open flash, en create a new file before you are going to start and add action-script to the flash document save the file in the same directory where you saved the XML file.


Now go to the first frame in the time line, after that select the text box tool from the tool menu on the left.

Draw two text box fields on the stage, one will be for the subject and the other will be for the text.
You can make the one for the text higher so more text will appear at once.

Select the first text box and go to properties as shown in the image below, you can find the properties at the bottom of the screen.

In the properties tab, you can select a type for the text box, static text,dynamic text and input text. Select dynamic text from the drop down menu. Under the drop down menu, you have an input field, click on it a type subject. Now we have gave the subject text box the name subject.
Do exactly the same thing for the text box for the text and give it the name mytext.

In the middle of the properties window, you can see that the text box is set to Single line change that into multiline.


Place the content in a dynamic text box
The only thing that is left, is the code in Flash. Again select the first frame in the time line, hit the F9 key on the keyboard. the action script window should appear now.

put in the following code.

xmlData = new XML();
xmlData.ignoreWhite = true;
xmlData.onLoad = loadXML;
xmlData.load("mytext.xml");

function loadXML(loaded) {

if (loaded) {
xmlNode = this.firstChild;
subject = [];
text = [];
total = xmlNode.childNodes.length;
for (i=0; i<total; i++) {
subject[i] = xmlNode.childNodes[i].childNodes[0].firstChild.nodeValue;
text[i] = xmlNode.childNodes[i].childNodes[1].firstChild.nodeValue;
showtext(i);
}

}else{
content = "file not loaded!";
}
}function showtext(i){
_root.subject.text = subject[i];
_root.mytext.text = text[i];
}

stop();